
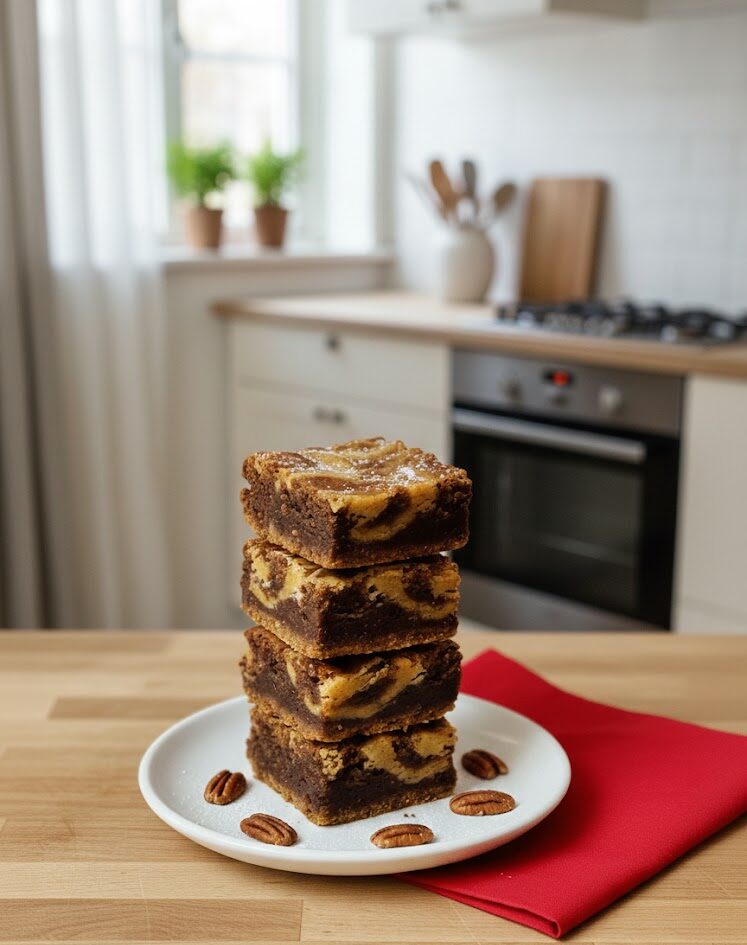
There’s something irresistible about the combination of deep chocolate and caramelized spiced cookies. These fudgy Biscoff brownies bring the best of both worlds together in one decadent dessert. With a buttery cookie crust on the bottom and creamy swirls of cookie butter baked into the brownie batter, every bite feels indulgent, rich, and deeply satisfying.
This is the kind of dessert that doesn’t need an occasion. It fits just as perfectly on a weekend baking list as it does on a dessert table for guests. The texture is dense and fudgy without being heavy, and the flavor balance between cocoa and Biscoff keeps things interesting rather than overly sweet.
If you’ve ever felt that brownies can be a little one-note, this recipe changes everything.
Why These Biscoff Brownies Stand Out
What makes these brownies special isn’t just the addition of Biscoff—it’s how each layer plays a role.
The crust is made from finely crushed Biscoff cookies mixed with melted butter, pressed firmly into the pan. Once baked, it creates a sturdy, flavorful base that contrasts beautifully with the soft brownie layer above it.
The brownie batter itself is designed to stay moist and fudgy. There’s no overmixing, no excess flour, and just enough structure to hold those cookie butter swirls in place. As the brownies bake, the Biscoff spread melts slightly, forming ribbons of caramelized flavor throughout the chocolate.
The result is a brownie that feels bakery-worthy but is still simple enough to make at home.
The Secret to a Perfect Crinkly Top
A classic brownie deserves that thin, crackly top—and this recipe delivers.
The key lies in how the eggs and sugars are mixed. By whipping them together until pale and slightly thickened, you dissolve the sugar properly and incorporate just enough air. As the brownies bake, this creates a delicate, shiny crust on top while keeping the center dense and fudgy.
You can use a hand mixer, stand mixer, or even a whisk if you’re feeling motivated. The goal isn’t volume, but texture—smooth, light, and creamy before adding the rest of the ingredients.
What Testing This Recipe Taught Me
After multiple test batches, a few small details proved to make a big difference:
- Finely crushed cookies matter. The more sand-like the crumbs, the easier it is to press the crust evenly. Large chunks create uneven spots that don’t hold together as well.
- Slightly warm cookie butter swirls better. A few seconds in the microwave softens it just enough. Cold spread won’t swirl; overheated spread disappears into the batter.
- Metal pans work best. They conduct heat evenly and help avoid overbaked edges with an underdone center.
These little adjustments take the brownies from good to unforgettable.
Simple Swaps and Variations
This recipe is flexible and forgiving, making it easy to adapt:
- Egg-free option: Use flax eggs for a plant-based version.
- Sugar choices: All brown sugar adds chewiness, while all white sugar gives a cleaner sweetness.
- Butter: Unsalted butter works well—just add a small pinch of salt.
- Gluten-free: A reliable gluten-free flour blend can be used without affecting texture.
- Alternative spreads: While Biscoff is the star, similar spreads like chocolate hazelnut or peanut butter can work in a pinch.
Each variation keeps the spirit of the recipe intact while allowing room for creativity.
How to Store, Freeze, and Serve These Brownies
One of the best things about these brownies—aside from how good they taste—is how well they keep. Their fudgy texture actually improves after they’ve had time to set, making them ideal for making ahead.
- Room temperature: Store the brownies in an airtight container for up to 3 days. Keep them away from heat to prevent the cookie butter swirls from becoming oily.
- Refrigerator: For a firmer texture and extra clean slices, refrigerate them for up to 5 days.
- Freezer: Freeze the brownies uncut for best results. Wrap them tightly in plastic wrap, then in foil, and freeze for up to 2 months. Thaw overnight in the refrigerator before slicing.
When serving, these brownies are excellent on their own, but they’re also incredible slightly warmed with a scoop of vanilla ice cream or a drizzle of melted cookie butter.
Tips for Clean Slices and Bakery-Style Results
If you want neat, professional-looking squares, patience is key.
Let the brownies cool completely before cutting—this allows the layers to set properly. For ultra-clean cuts, chill the brownies for 30–60 minutes, then slice using a sharp knife. Wipe the blade clean between cuts and, if needed, warm it slightly under hot water and dry it before slicing.
For thicker brownies, use an 8×8-inch pan as written. For a thinner version or a crowd-size batch, double the recipe and bake it in a 9×13-inch pan, checking for doneness around the 25-minute mark.
Common Mistakes to Avoid
Even simple recipes can go wrong without a few precautions:
- Overbaking: Brownies continue to cook as they cool. Remove them when a toothpick shows moist crumbs, not dry batter.
- Overmixing the flour: Fold gently to avoid a cakey texture.
- Skipping parchment paper: It makes removal and slicing much easier, especially with the cookie crust layer.
Keeping these points in mind ensures consistently rich, fudgy results.
Why This Recipe Is Worth Repeating
These brownies strike a balance between indulgence and ease. The ingredient list is approachable, the steps are straightforward, and the payoff is a dessert that feels special every single time.
Whether you’re baking for guests, a bake sale, or just to satisfy a personal craving, this recipe earns a permanent spot in your rotation. Once you experience the contrast of the spiced cookie crust with the deep chocolate center and creamy swirls, it’s hard to go back to ordinary brownies.
-
Preheat the oven to 350°F (175°C). Line an 8×8-inch metal pan with parchment paper, leaving overhang on the sides.
-
In a bowl, combine the crushed cookies and melted butter. Mix until evenly coated. Press firmly into the prepared pan to form an even crust.
-
In a separate bowl, beat the eggs with both sugars for about 1 minute, until pale and slightly thickened.
-
Stir in the melted butter and vanilla extract until smooth.
-
Sift together the flour, cocoa powder, and baking powder. Gently fold into the wet mixture just until combined.
-
Spread the brownie batter evenly over the crust.
-
Warm the cookie butter for 5–10 seconds until just pourable. Spoon it over the batter and swirl gently with a knife.
-
Bake for 22–25 minutes, until the edges are set and the center shows moist crumbs when tested.
-
Allow the brownies to cool completely before slicing.
Notes
- For cleaner slices, chill the brownies before cutting.
- Do not overbake; a soft center is key to a fudgy texture.
- Use a metal pan for even baking and better structure.